Configure NAT
Configure NAT
NAT (Network Address Translation) is the translation of private IP addresses inside external IP addresses and vice versa. This provides your virtual machine with access to the internet. To configure NAT in the vCloud Director you need to configure the SNAT and DNAT rules.
Create a SNAT rule
SNAT (Source Network Address Translation) changes the source address when forwarding a packet.
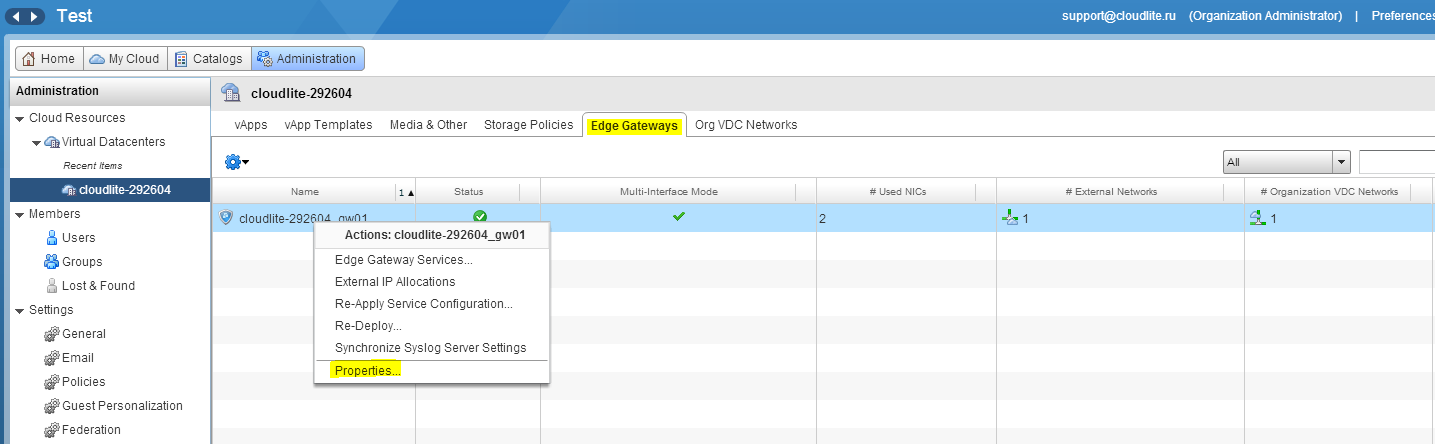
1. Go to Administration, and double-click on your virtual data center. In the pop-up settings menu, go to the Edge Gateways tab. Select the required vShield Edge and right-click on it. Select Properties.
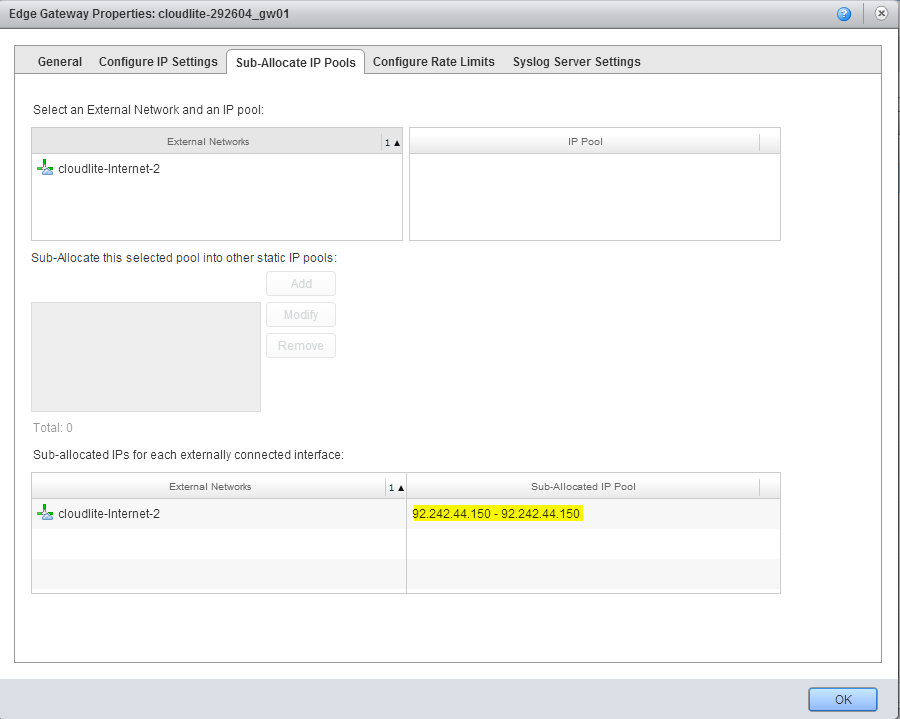
2. In the pop-up window in the Sub-Allocate IP Pools tab, you can view the external IP address or its range. Close the window.
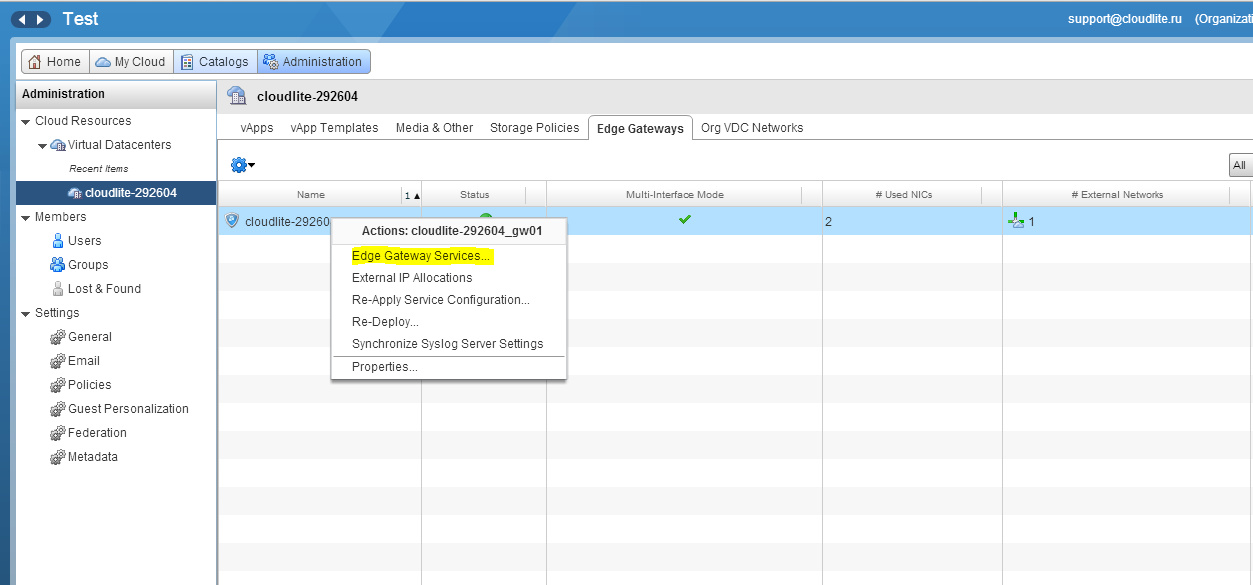
3. Right-click again on vShield Edge. In the pop-up menu, select Edge Gateway Services.
4. In the pop-up window, open the NAT tab and click on Add SNAT.

5. In the new window:
- In the Applied on field, specify the external network (not the Org-VDC network!). This can be cloudlite-internet or cloudlite-internet-2;
- In the Description field, specify the SNAT rule description;
- In the Original (Internal) source IP/range field, specify the internal address range, such as 192.168.0.0/24;
- In the Translated (External) source IP/range external address, through which the internet connection will be enabled and which you viewed in the Sub-Allocate IP Pools tab (refer to page 2).
Click on OK.

Create DNAT rules
DNAT changes the packet destination address and destination port. It is used to redirect incoming packets from an external address/port to a private IP address/port in a private network.
-
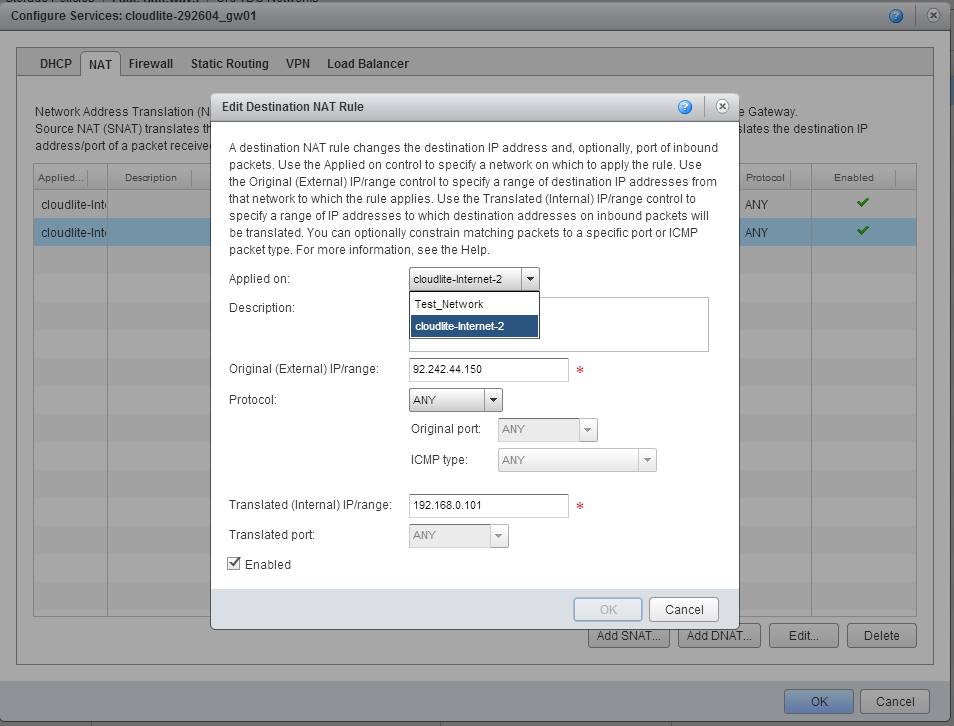
1. In the Configure Services window, select the NAT tab and click on Add DNAT.
2. In the pop-up window,
- In the Applied on field, specify the external network (not the Org-VDC network!);
- In the Description field, specify the DNAT rule description;
- In the Original (External) IP/range field specify the external address (the address from the Sub-Allocate IP Pools tab);
- In the Protocol field, specify the the protocol;
- In the Port field, specify the port;
- In the Translated (Internal) IP/range, specify the internal IP address, i.e. 192.168.0.101
Click on OK.
Now you need to configure the Firewall. By default, Deny is selected under Default action, so the Firewall will block all traffic. To avoid this you need to configure the rules.