How do I configure the VPN-connection?
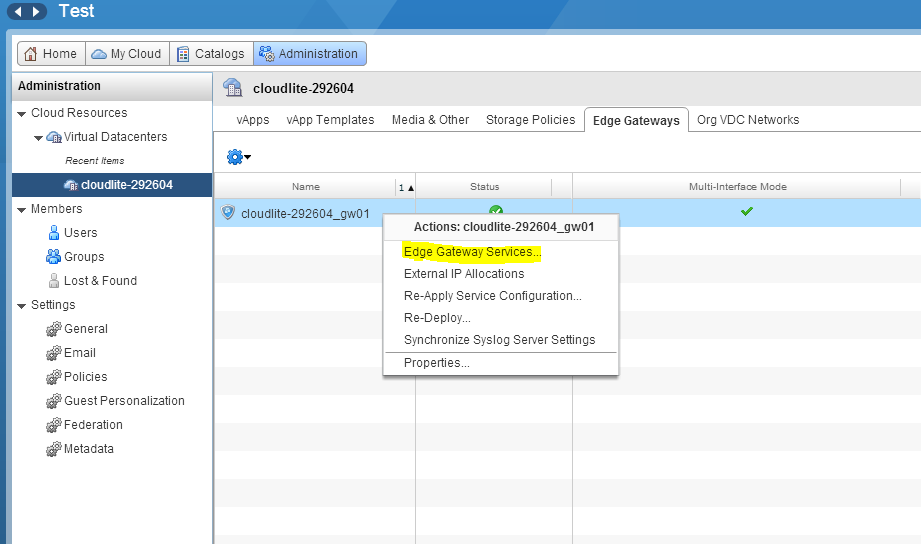
- Open vCloud Director control panel, go to Administration and click on the virtual data center. Open Edge Gateway Services tab, select required vShield Edge. Right click and select Edge Gateway Services.
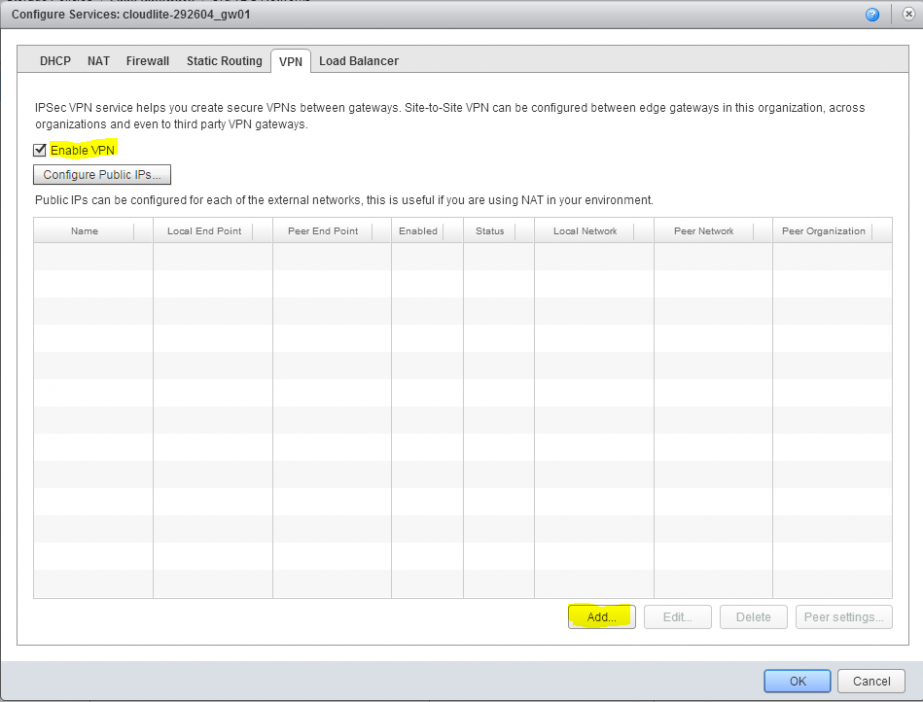
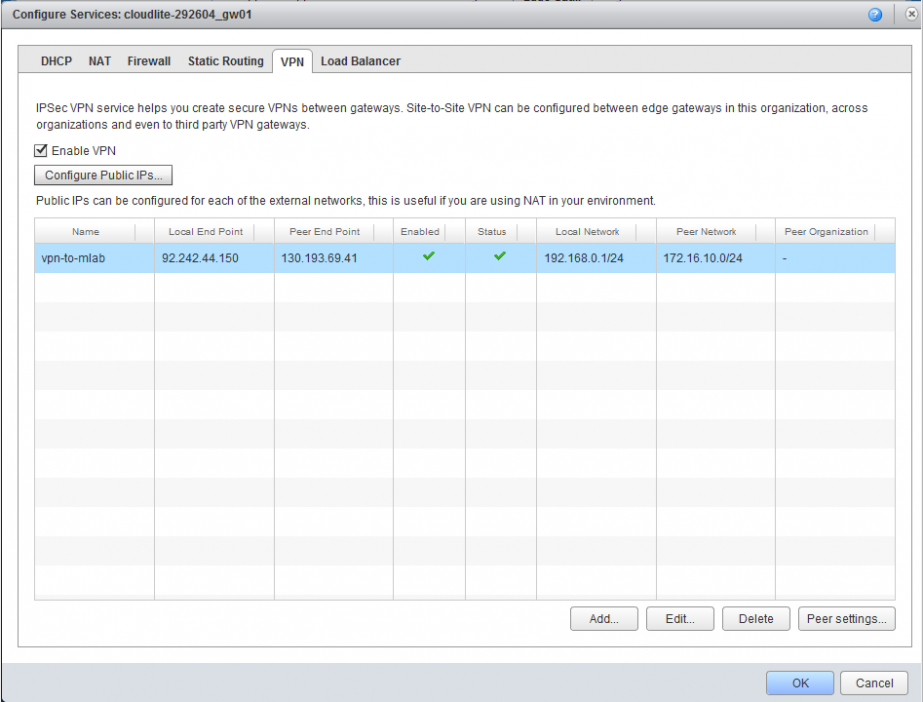
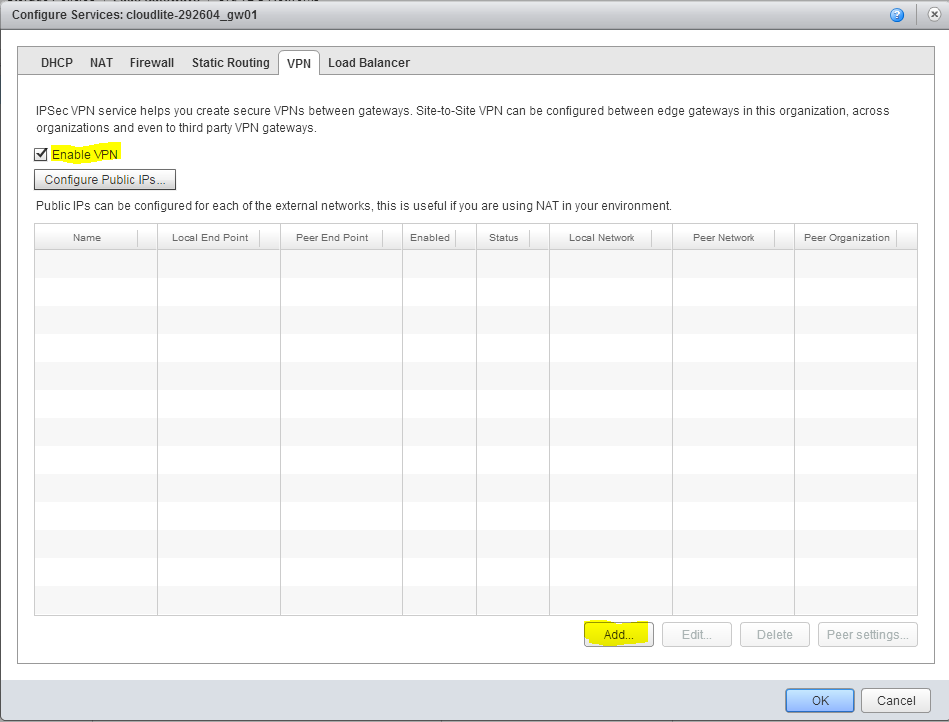
- Go to VPN tab in the new window and activate VPN by checking Enable VPN box. Click Add to create a new tunnel.
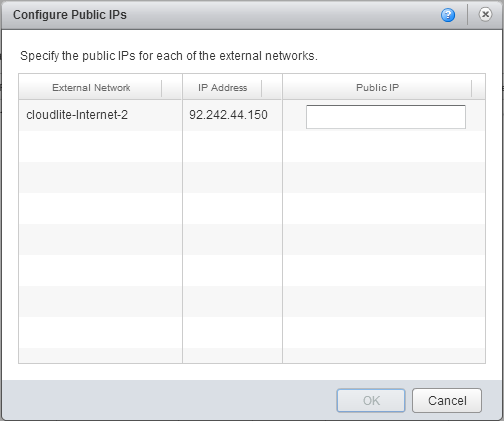
- You can change external IP which is dedicated to the pool by default in Configure Public IPs tab.
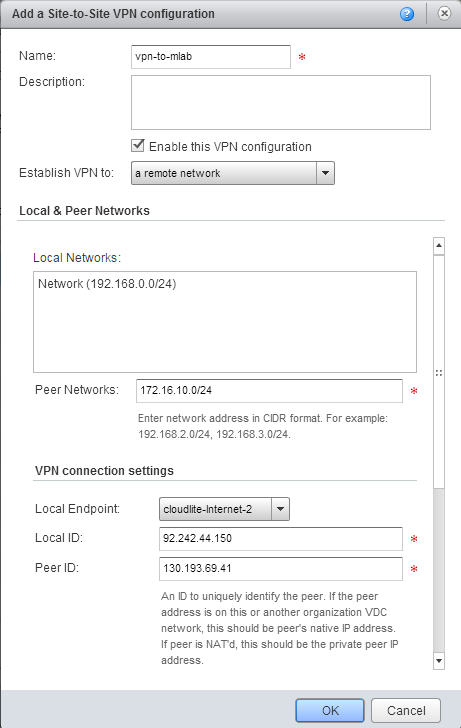
- Open Add a Site-to-Site VPN configuration tab to configure Name and Description of VPN if needed.
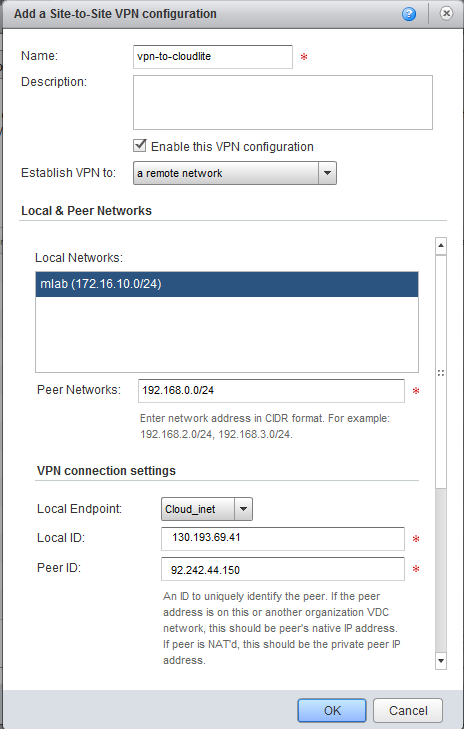
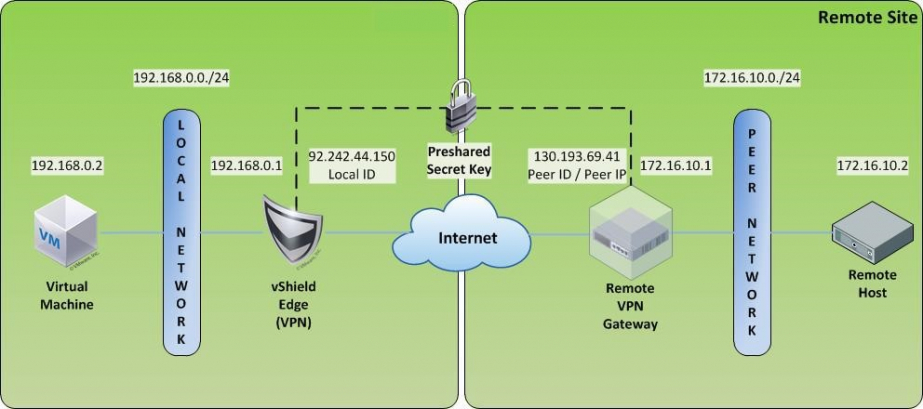
Use Establish VPN to choose a remote network, as VPN Gateway (second vShield Edge) is on a different network.
Use Local Networks to specify local network which will participate in VPN-connection and which is connected to the Edge.
Use Peer Networks to specify internal network connected to the point, where VPN is configured, in CIDR format (eg, 192.168.10.0/24).
Use Local Endpoint to select external network (Internet), which shall connect our organization to the other. In our case, this can be cloudlite-Internet or cloudlite-internet 2.
Use Local ID to specify external IP-address of our vShield Edge which is used to create VPN-connection.
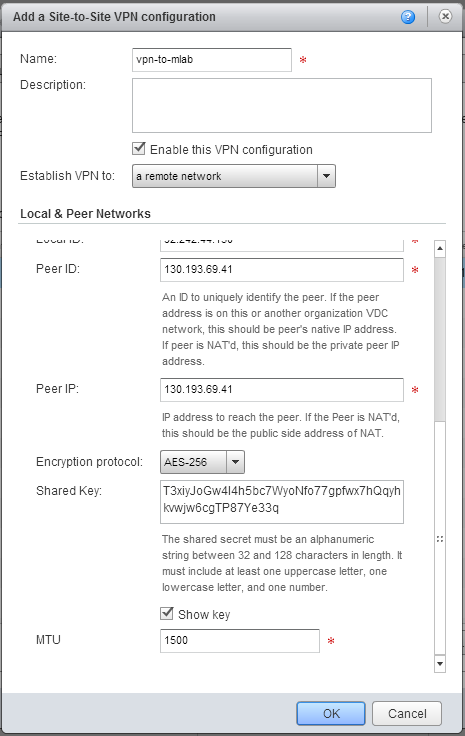
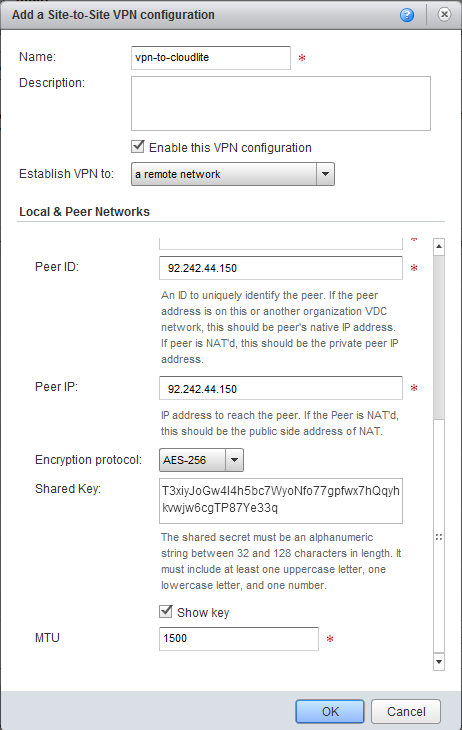
Use Peer ID to specify the external remote VPN Gateway IP-address.
Use Peer IP to specify VPN Gateway external IP-address (in this case, the Edge of another organization).
Use Encryption protocol list to select encryption protocol (AES-256, AES, 3 DES).
Check Show key box. Copy the key: it will be needed for configuration on the receiving side of VPN-tunnel.
If necessary change the default value for the package size in MTU.
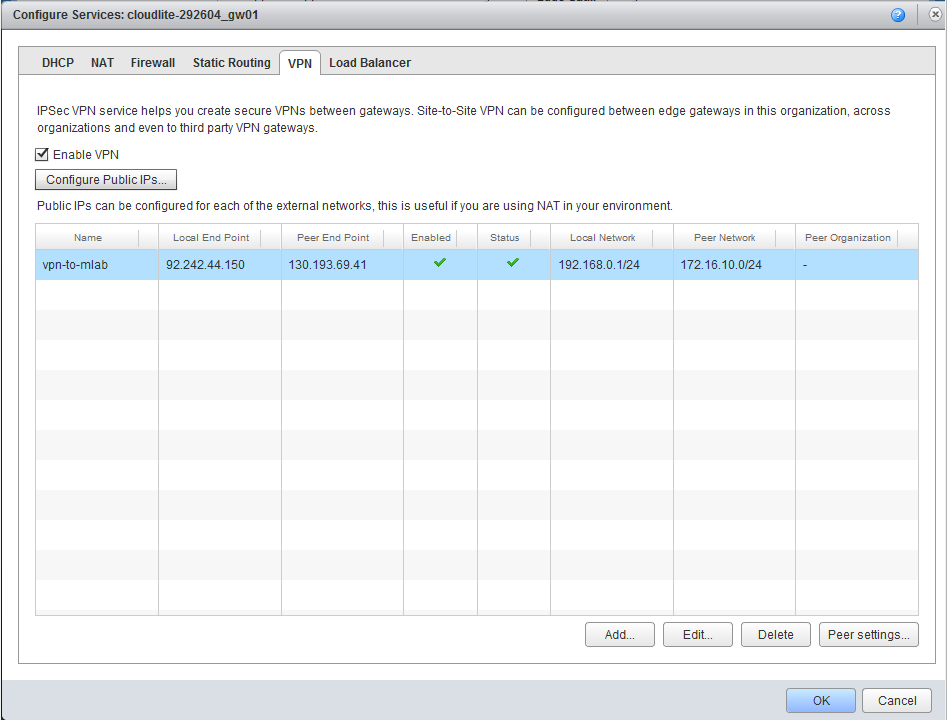
- Click OK. The created VPN-tunnel will appear in Edge Gateway Services in VPN tab.
- Now you need to configure receiving side in the same way. Open settings of the second vShield Edge, located in the other cloud,repeate the same steps as for the first stage, but set all Peer parameteres as Local and vice versa.
- Insert the key that we copied earlier.
- Ready!